Create a 'Make-a-Book' activity

Add a Picture Bank to a Clicker Book
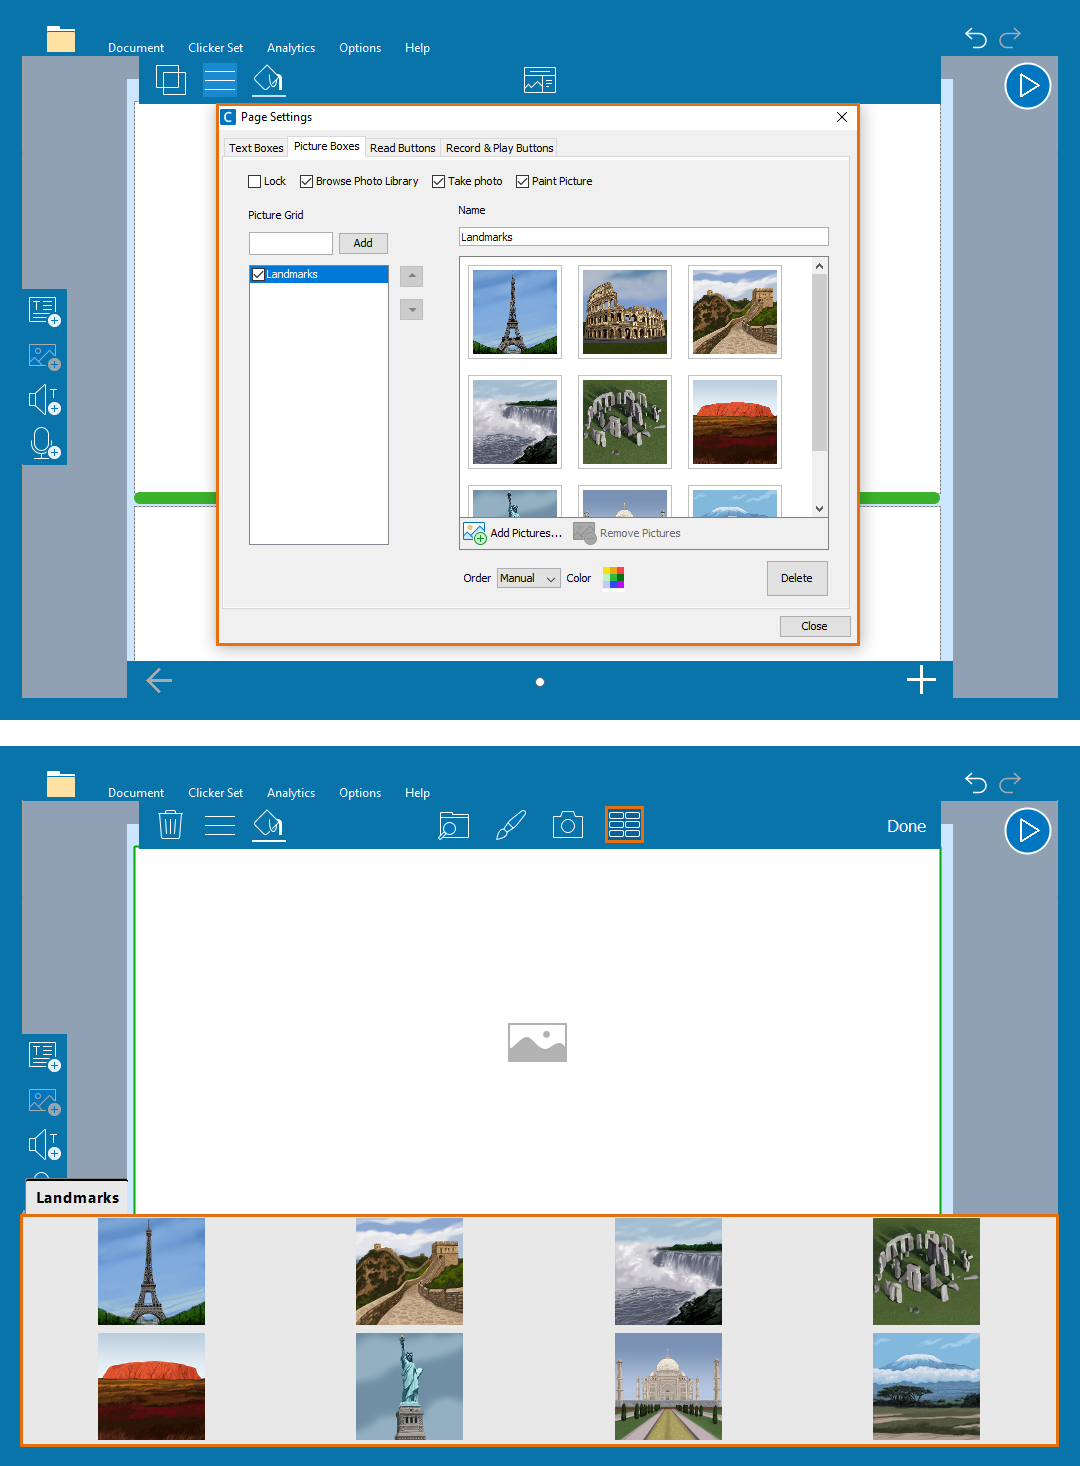
Add pictures for children to choose from when creating a Clicker Book:
- Click
 with nothing on the page selected:
 - Go to the ‘Picture Boxes’ tab to add a Picture Bank.
- Give your Picture Bank a name, then click ‘Add’.
- Click ‘Add Pictures’ to choose images for your Picture Bank from images saved on your computer or the CrickPix2 library.
- Repeat to add multiple Picture Banks.
- Check or un-check the boxes at the top of the window to change how children can add images to the Clicker Book.
- Click the arrows to change the order of multiple Picture Banks.
Use a Picture Bank:
- Select a Picture box:
- Click
 .
. - Click an image to add it to the Picture box.

Add a Word Bank to a Clicker Book
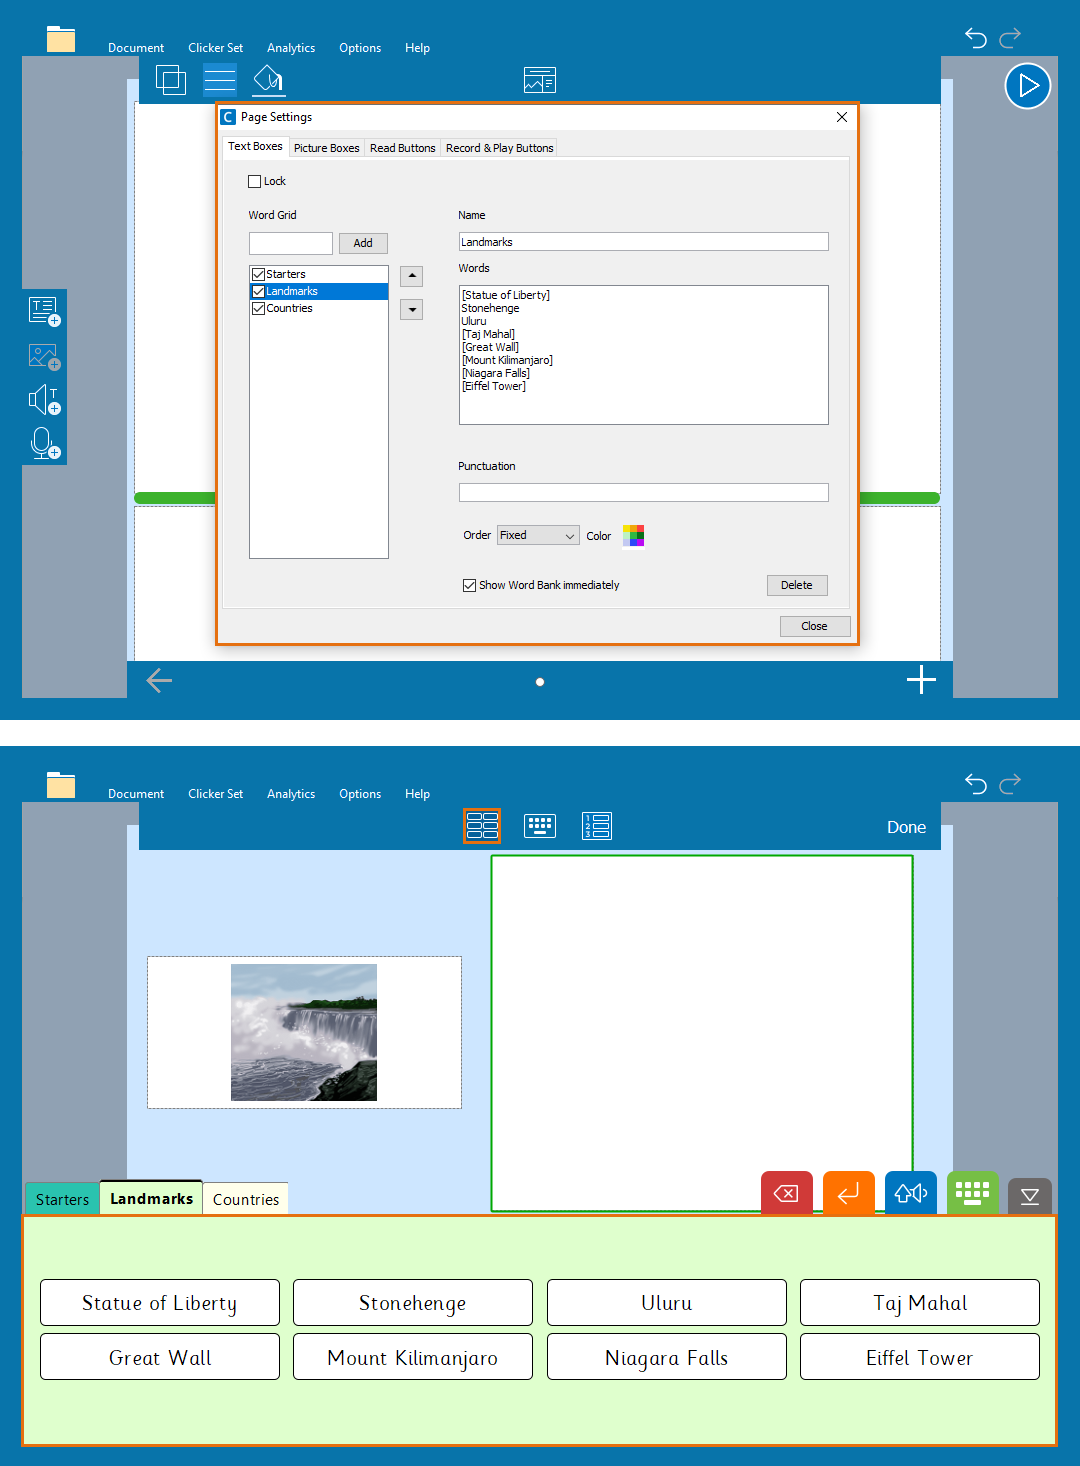
Add words and phrases for children to use when writing in their Clicker Book:
- Click
 with nothing on the page selected:
 - Go to the ‘Text Boxes’ tab to add a Word Bank.
- Give your Word Bank a name then click ‘Add’.
- Type or paste text into the ‘Words’ text box to make up your Word Bank.
- Repeat to add multiple Word Banks.
- Check the ‘Show Word Bank immediately’ checkbox for the Word Bank to appear when you double-click a text box.
- Click the arrows to change the order of multiple Word Banks.
Use a Word Bank:
- Select a Text box:
- Click
 if the Word Bank isn’t set to open immediately.
 - Click a word or phrase to add it to the text box.
- Right-click a word in the Word Bank to hear it.